
Setting up IPTV for Firestick should begin with compatibility, before you download a player or purchase an account. “Firestick” is often used for several Fire TV Stick models, and instructions written for one device may not fit another. A reliable checklist helps you ask the right questions and avoid repeating the setup.
This guide focuses on choosing a supported app and getting it ready for everyday use. Keep your exact device model and the provider’s current instructions beside you as you work through the steps.
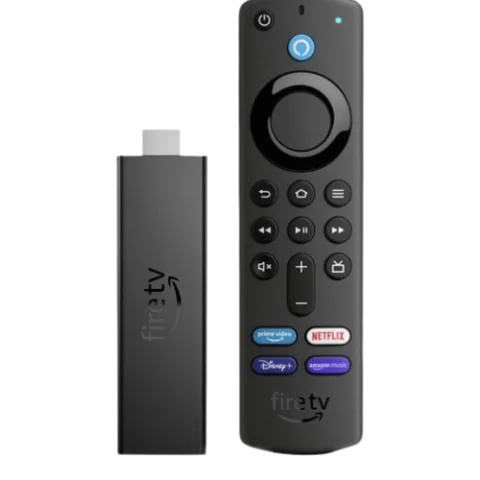
1. Identify your Fire TV Stick
Find the model information in your device settings or Amazon account and note the software version. Menu labels can vary, so use Amazon’s instructions for your particular device if you cannot find the details. Do not rely only on the appearance of the remote or the name on an old receipt.
Amazon publishes specifications for its Fire TV devices, including model and operating system information. Use the exact model when asking whether an IPTV app is supported. Compatibility should be confirmed for that device, rather than assumed across the whole Fire TV range.
2. Confirm the player before the subscription
Ask UKIPTV.co which app is supported on your model and which login method the service supplies. Check the app’s publisher and current store listing. Similar app names can make it easy to install a different player from the one described in your instructions.
Separate the player from the subscription in your checklist. Ask whether there is an additional app licence, whether it expires and whether payment to the app developer is separate. Avoid entering service credentials into an unrelated app simply because its name contains IPTV.
- Exact Fire TV Stick model and software version.
- Supported app name and publisher.
- Any separate player charge or activation step.
- Login format supplied with the service.
- Allowed simultaneous connections for the selected plan.
3. Prepare the television and account details
Connect the Fire TV Stick using the power equipment specified for your model, select its HDMI input and confirm that the remote works. Make sure the device is registered to the appropriate Amazon account. Have your home network details available, but keep them private.
Next, prepare the service details from the provider’s own order instructions. Depending on the supported player, these might include a server address, username and password, or a playlist address. Do not publish them in a forum or send an uncensored screenshot when asking for help. Copy addresses carefully; an extra space can be difficult to notice on a television.
4. Check updates and install the supported app
Check for device software updates before beginning. Amazon’s Fire TV update instructions direct users to the software update controls in Settings. Allow any update to finish before continuing, and follow the wording shown on your model.
Where the supported player is offered through the Amazon Appstore for your device, use that listing and check the publisher before selecting Get or the displayed download control. Amazon provides official app download guidance. If the recommended app is unavailable, ask for a supported alternative instead of assuming instructions for a different model will work.
5. Add the account in the correct fields
Open the installed player and choose the login method specified by your provider. Match each field to the supplied details. A playlist address and a server address are not interchangeable labels, so ask for clarification if the screen differs from the instructions.
Use an account name you recognise if the app lets you label the profile. Wait for the initial guide or catalogue loading to finish before changing settings. If login fails, note the exact error and check the account details with support; repeatedly reinstalling the app makes it harder to identify which step needs attention.
6. Complete a first-use check
Check more than whether a picture appears. Try the remote’s back button, open the programme guide if included, save a favourite and confirm that you can return to it. Test sound through the speakers or audio equipment you normally use. If subtitles or accessibility features matter, check those before considering the setup complete.
Confirm the app can be closed and reopened without losing the profile. Then check the service under your household’s normal viewing arrangement, within the connection allowance. This is a setup acceptance check, rather than a reason to change advanced network settings.
7. Keep a simple support record
Save the app name, device model and order reference with your renewal date. For a support request, describe the step that failed and include the error text without revealing credentials. You can ask UKIPTV.co to confirm device and app compatibility before ordering, then review the current subscription options once those details are clear.
Frequently asked questions
Will every IPTV app work on every Firestick?
Do not assume so. Confirm the exact device and supported app together, and check the current app listing rather than relying on an older installation video.
Do I need to buy a new Fire TV Stick?
First ask whether your current model supports an appropriate app. Buying new hardware before checking compatibility may not solve the actual setup requirement.
Is the player payment the same as the service payment?
It may be separate. Confirm what each charge covers, who receives it and whether either item needs renewal before completing the purchase.
What if the app screen looks different from the instructions?
Check the app name, publisher and version, then request instructions for that version. Avoid guessing which fields should contain private service details.